Thursday 26 December 2013

Flaky Fun

Happy Boxing Day! Hope you had a good day yesterday and are not too stuffed still. We had the usual quiet day here, but today we are off to my mum's for a less quiet day.

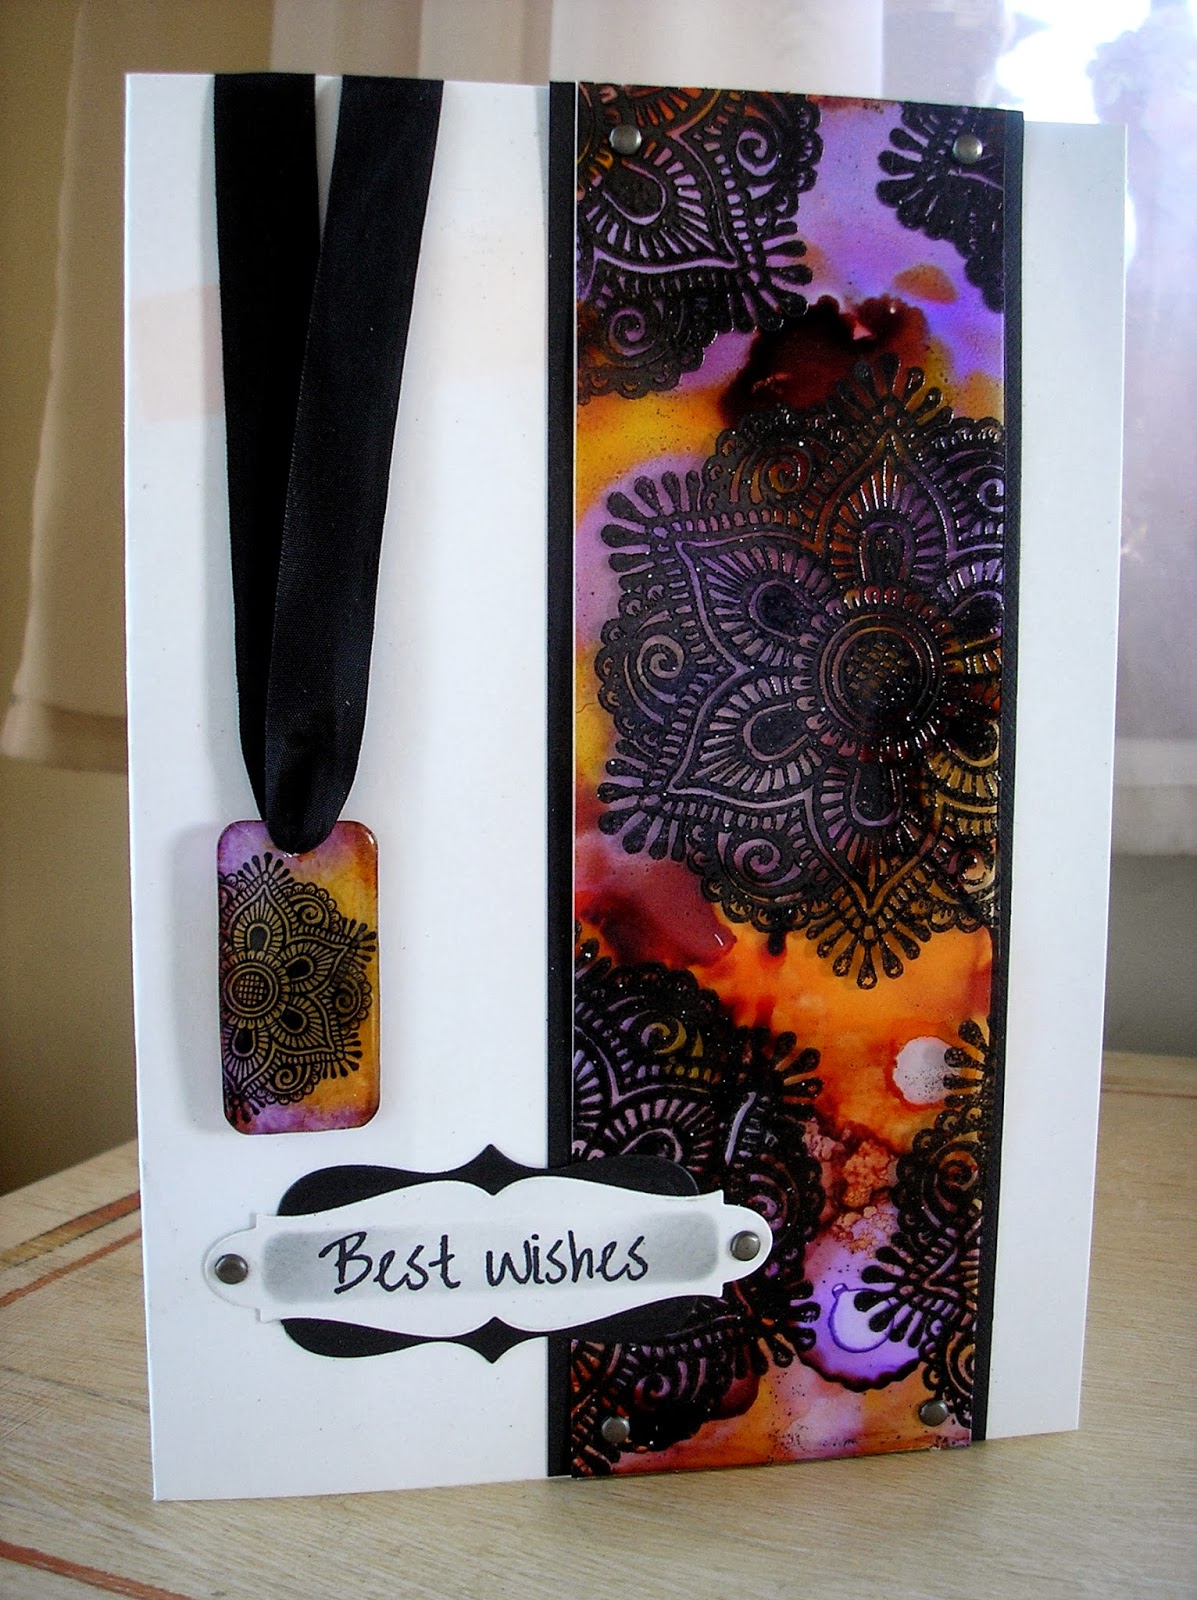
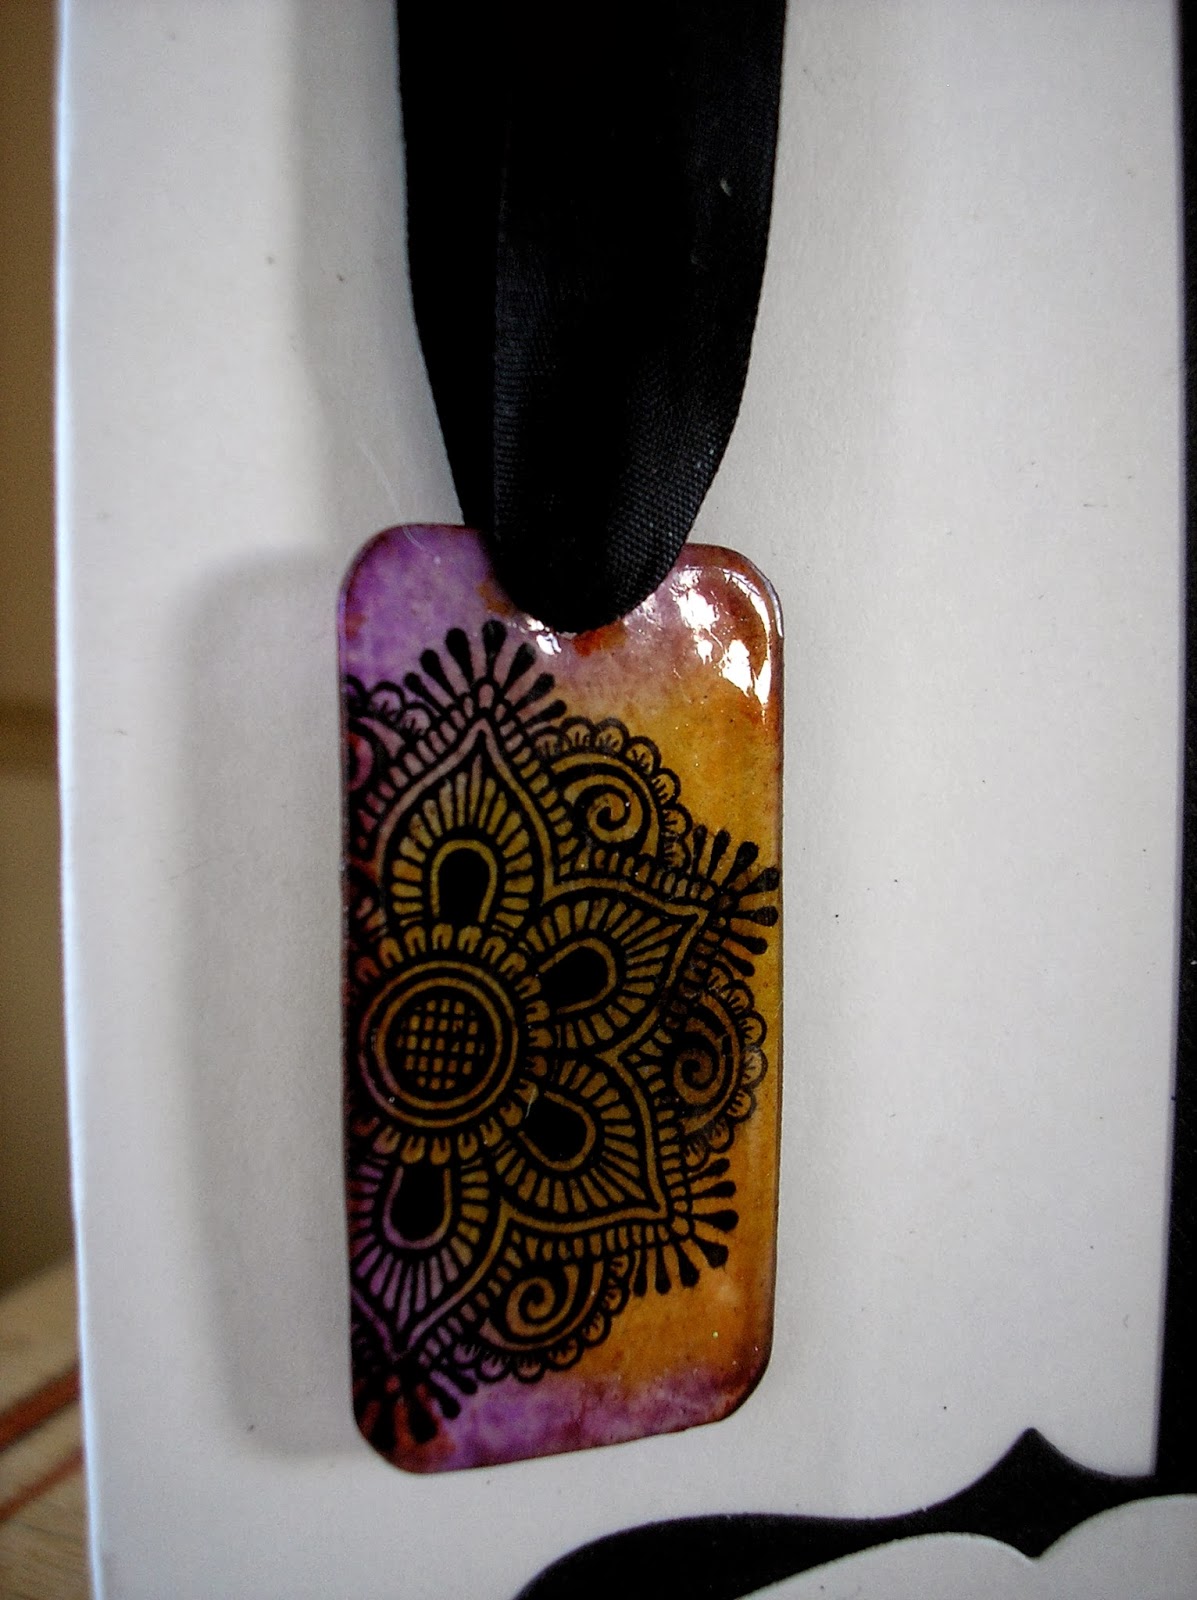
Today I have another project using the Henna stamps by Creative Expressions. I've tried taking the pics in different lights, but I really struggled to get a shot that did it justice - these are the best I could get, but take it from me the combination of the gilding flakes and the stamps is stunning.


Here's how I did it.


Squeeze a good 'blob' of Flake and Glitter glue onto a craft sheet, and use a piece of cut and dry foam to apply the glue to your stamp.


Apply the Verdigris flakes, making sure you have plenty of coverage.


Take a piece of Rub it, Scrub it sponge to remove the excess flakes and reveal the design.


To make the flowers, you will need three gilded flowers stamped with the Mandala


Cut up the flowers as above.


Curl the petals and glue the flower layers as shown.


Stack the layers and use plenty of Cosmic Shimmer glue to ensure a good stick.


I dd the same to my mdf blank after painting with Claudine Hellmuth Black Gesso and using the Mosaic stamp. 


As an accent I added Golden Light Gilding Wax then arranged my flowers around a Seam Binding bow and an Adhesive Swirl

Thanks for stopping by.

Thursday 19 December 2013

Make a Date

My third project using the new Henna stamps by Creative Expressions for you today. Like last weeks projects, this started life as an inked background that went perfectly with the ethnic feel of the stamps.

I took my A4 background and stamped the Petals stamp a few times. I cut out concentric layers and stacked them to form a medallion. I stamped the  image again onto a square of the background and stuck my medallion onto it.


Thursday 12 December 2013

Duly Noted

Today I have a pair of projects using the Creative Expressions Henna Stamps.

I made some background papers a while ago using spray inks and masks. I loved the papers but didn't get any further than that because I didn't want to cut them up! When I first got these stamps, I had a eureka moment - they went perfectly with my backgrounds.

My inked backgrounds were A4, so I chopped one in half and stamped the Mandala on one and Petals on the other. I took some plain copier paper and cut that in half, then folded it to A6, and did the same to the inked covers. I sewed the paper and cover together with pamphlet stitch.


To make the bookmarks, I stamped the images onto shrink plastic, made a hole and then attached to the spine with black burlap 


To add the word art stamping, I applied perfect medium with my finger to give a rough edge. I heat embossed several layers and then stamped the Just Word Art into the molten embossing powder.

Thanks for stopping by.

Sunday 8 December 2013

White Christmas

I'm loving using the new Henna Stamps from Creative Expressions, the mandala designs are so versatile, and done in white, have a real snowflake look.

For this card, I stamped and embossed with Arctic Pearl and cut out several layers of the design. My card blank was cut using Grande Nestabilities Labels One and I used the same dies for my layers. To mat my mandala, I took some adhesive film. applied it to my cardstock before cutting out, then applied Cosmic Shimmer Glitter.


Thursday 5 December 2013

Henna Stamps

This month, Creative Expressions have sent us some fantastic new stamps to play with - I'm loving playing with them so much as they're so versatile. So without further ado, here is my first project - well technically speaking its two projects in one.

My initial idea was a pendant, but then I wanted something to display it on,so it evolved into a card and pendant gift.

I stamped the Henna Mandala onto shrink plastic. After shrinking (I find I get a more even shrink if I do this in the oven rather than with my heat gun) I added alcohol ink on a blending tool and also directly dripped until I was happy with the effect. To seal the piece and to add gloss, I coated it with UTEE on both sides. I added seam binding to finish the pendant.

For the card, whilst I had my alcohol ink on my blending tool, I coloured a piece of acetate and again added drips of ink until I was happy with the result. I then turned over the acetate and stamped and heat embossed the design. I mounted a strip of the acetate onto white card with brads, then black card. I stamped the greeting from Fanciful Phrases onto two of the Grommet Tags.


Thanks for stopping by.