Thursday, 18 December 2014

A little gift

After my recipe book last week, I was inspired to make a little notelet set using all of the Chalkboard set by Creative Expressions.

When the cards were finished, I simply tied them together with bakers twine and added a tag - I love the designer feel the set has and they were so simple to make - less is certainly more here.


I stamped using Adirondack Snow Cap (a must have for the chalk effect) onto black card, cut the corner with a decorative punch, then matted onto white and then the kraft card blank - cutting the corner really draws the eye in and shows off the stamped image, as does the black /white contrast.


Thanks for stopping by.

Thursday, 11 December 2014

Yummy stuff

If you're a foodie, or know a foodie, the new Chalkboard stamps from Creative Expressions will be perfect for you. For my first project using them, I've gone with an upcycled gift - perfect as a stocking filler for the cook in your life. I started with a kraft covered spiral bound notebook (you could make your own book if you have a cinch or bind it all, but this one was so inexpensive that it was cheaper to buy than it would be to make)


I stamped the A6 Sketched Utensils onto a strip of white card and wrapped some bakers twine around the strip before adding a scalloped border. Next I stamped and white heat embossed the Real Good stamp onto black card, punched the corners and matted onto kraft card. I applied this to the book with silicone to lift it away from the book. Finally, I added a knot of twine.


Thanks for stopping by.

Thursday, 4 December 2014

Lets Dance

Today, for my first Creative Expressions post of the month I have a slightly unusual card fold and a tutorial worksheet for you to download and follow - just click on the link below.


Here's the link to my PDF for you to follow along.

Thanks for looking

Thursday, 27 November 2014

Winter Kisses

My final project for this month for Creative Expressions is also my final Christmas card for this year! I've kept this one fairly simple to maybe inspire anyone who is in a blind panic thinking they'll never get done in time. You could even save a bit of time and cardstock by leaving out the first mat and by not glittering the snowflake. For an almost flat card - to save on postage, you can leave out the foam pad under the snowflake and glue it directly to the card.

All I did was randomly stamp the snowflakes from the Snowflakes and Sprigs stamp set using perfect medium, then embossed in silver. I matted a white card with white card, them my stamped background. I stamped and embossed my greeting which is from Pinecone Christmas. Next, I applied some adhesive film to a scrap of white card, removed the backing and applied Diamond Sprinkles to cover the snowflake. I applied the snowflake to the card with a foam pad, but as I said, you can omit this if you want a flatter look.


Thanks for stopping by

Thursday, 20 November 2014

As Seen on TV!


The eagle eyed among you may have already seen a fleeting glimpse of my sample for this week. I made this for one of Julia's Create and Craft shows a couple of months ago. I love how this turned out so thought it deserved a longer airing.
Every year, I make my mum a calender, and this is the one she will get this year. I combined the Anemone Planter to make a border and the Sunflower Delight to make my topper. The Spellbinder dies I used are the Fleur De Lys Squares and for the background I used the fabulous Tied Together embossing folder by Couture Creations. 


I coloured the stamped and gold embossed images with Cosmic Shimmer Pastel Watercolours and as a finishing touch, I heat embossed with gold onto a small Fancy Pearl Embellishment.
To add the calender tab, I simply stuck the tab into a mini card and added my sentiment to the tab.


Thanks for looking. 


Thursday, 13 November 2014

Falling Leaves

My second project of the month is this card using the Fancy Foliage stamp set from Creative Expressions.


I started with white card and blended oranges and yellows onto it. Next, I stamped the leaves with Sepia Archival ink and added more colour by painting Distress Inks in autumn shades onto the stamped images.
My greeting was also stamped with Archival ink onto a scrap of inked card.

Thanks for stopping by.

Thursday, 6 November 2014

Age Shall Not Weary Them

I have a special project to share today. I think it speaks for itself. This is my Great Grandad James Thomas Schofield who was killed near Ypres during the First World War. To commemorate the centenary, I wanted to make something fitting for my mum, who initially knew very little about her Grandad, but has over the last twenty something years made a real connection with him.


This is how I made it


I started with the Poppies mask by That Special Touch. I used Distress Ink to colour the design, masking as I went to minimize colour contamination.


Next, I took a script stamp and used sepia Archival ink through the mask so that the script only appeared on the flowers. 


I removed the mask, cleaned it, then re positioned it. I applied Perfect Medium through the mask and then clear embossed.


Then I went over the top of the whole piece with Newsprint Swirls...


followed by Crackle.


Finally over the whole piece with Gathered Twigs DI


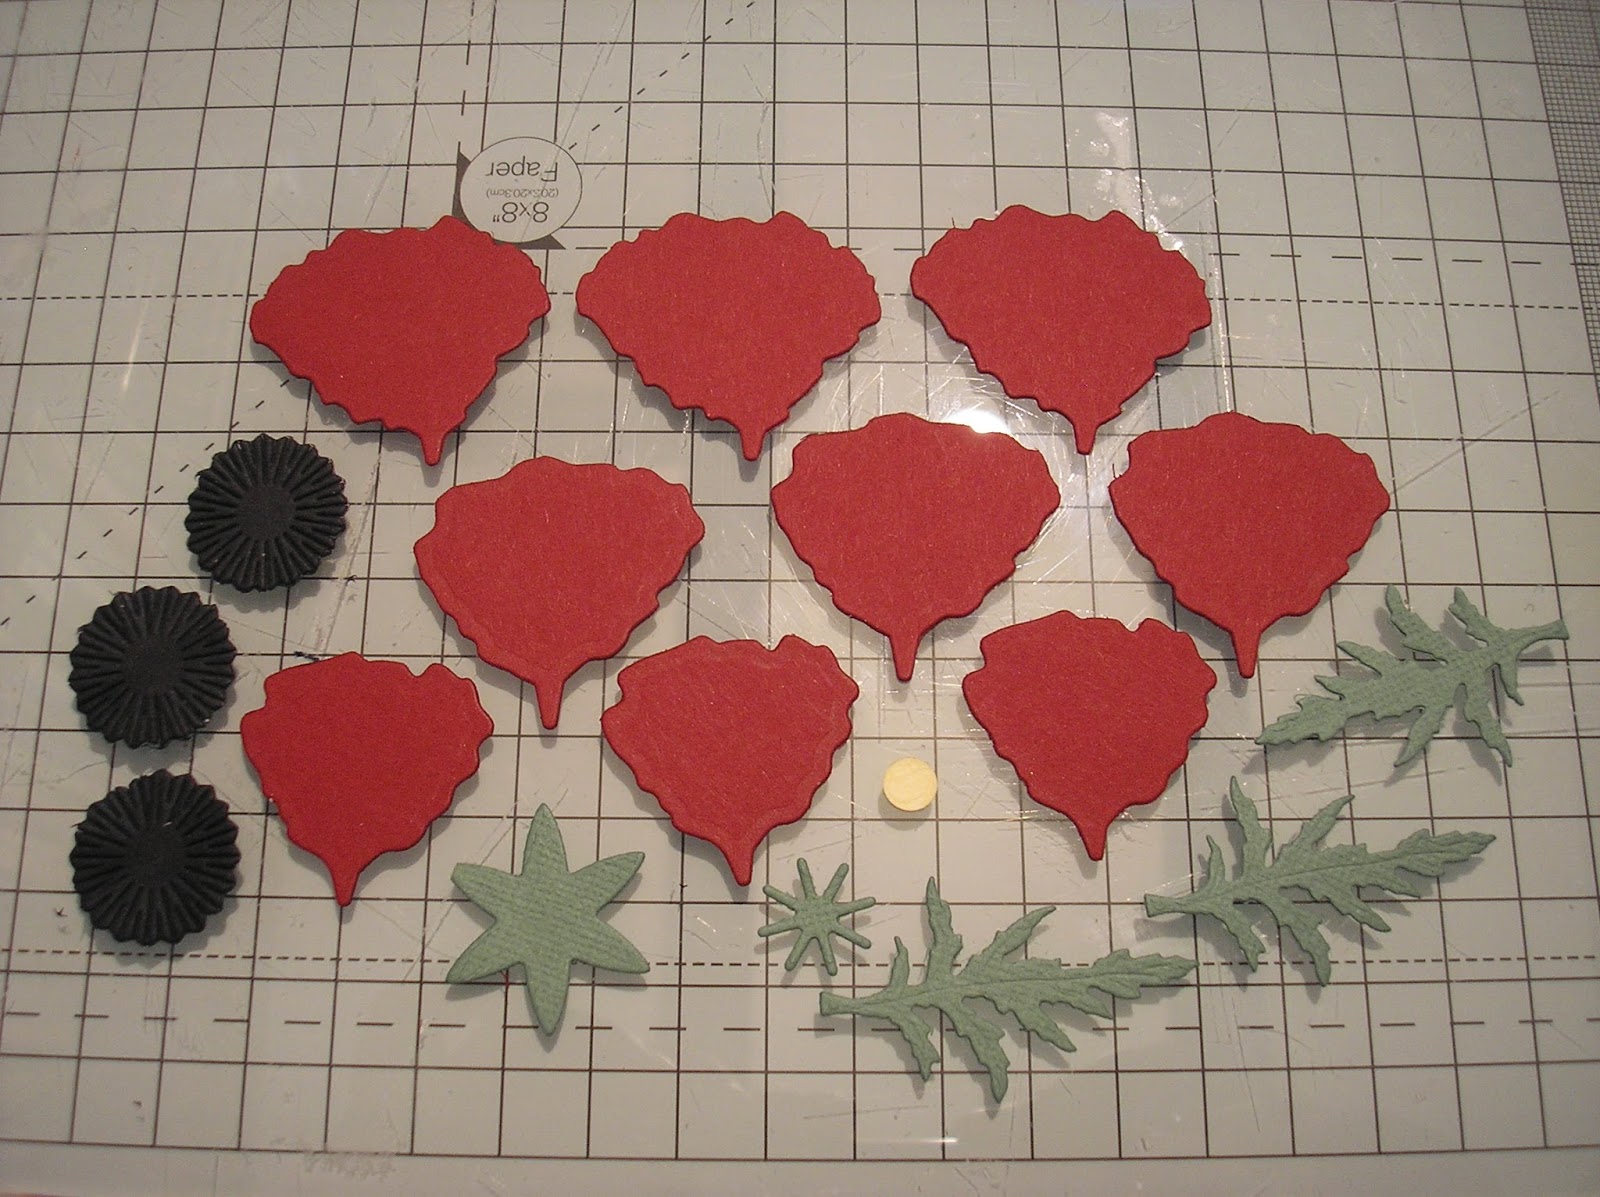
To make the poppies, I used the Spellbinders Build a Flower die set. I cut 6 each of the three sizes of petal, 3 of the star shaped calyx, three of the poppy centres, one each of the centre circle and the asterisk plus a few leaves.

I added ink to the petals.


Then used a ball tool to add dimension


I applied Cosmic Shimmer glue to the calyx


 then stuck the six petals of each size to each of the three calyx.


I made one for each of the three petal sizes and then stacked and glued the three together.


I used a ball tool to add shape to the centres,


and glued them together


I did the same with the three 'ruffles'.


Then stuck them together.


Assemble the flower with the centre in place and the leaves on the back.


Thanks for stopping by