Thursday, 28 November 2013

Winter Flowers Triptych

As it's Thursday again - time flies!- I'm sharing my final project using the Winter Flowers stamp set by Creative Expressions.

I love working with Fantasy Film, and hit on the idea of adding colour with alcohol ink - these flower stamps were perfect for this technique and of course the film takes the colour really well. If you want to recreate this project, I've created a step by step worksheet.


Thursday, 21 November 2013

Two for One

It's Thursday, so that means my regular post for Creative Expressions, and today I have two cards for you. My idea was initially for the coloured version, but I also liked the clean simplicity of the uncoloured images, so I used the same sketch for both cards.


This is what I used

Don't forget, you can still enter our blog hop by leaving a comment on the post below this one.
Good Luck!

Tuesday, 19 November 2013

Oh Hoppy Day!

Good morning, and welcome to my stage of the Creative Expressions Blog Hop.  We're giving away some fantastic prizes today, so be sure to leave a comment  - my prizes are -


I Do Pre Cut Stamp 

Glitter 

Cosmic Shimmer Dries Clear Glue

Cosmic Shimmer Silver Shine Details Embossing Powder 


There is also a prize up for grabs for one lucky person who comments at every stage of the hop.

If you were watching Create and Craft over the weekend, you'll have seen what the DT have been up to with these great new sets from Couture Creations; it astounded me how varied all the samples were and how we each see something different in the same products.

This is the card I've chosen to showcase today, but keep popping back as I'll be showing more in future blog posts. This card uses the Pattern Quilt set.


Use the Caught in Crystal technique - Sue Wilson has an excellent tutorial here - and apply the panels to three pieces of cardstock embossed using the folder from the set. Before adding the panels, highlight the embossing with DI.


Add interest to the layers using a Tim Holtz ruler to add faux stitching holes.


 Stamp and cut the flowers from the set as well as a greeting. 


The next step in the hop is Kerry Hickton, but here are the links for the whole hop, just in case you're lost

Don't forget to leave me a comment to be in with a chance of winning.
Have a Hoppy Day!


Thursday, 14 November 2013

Christmas Rose

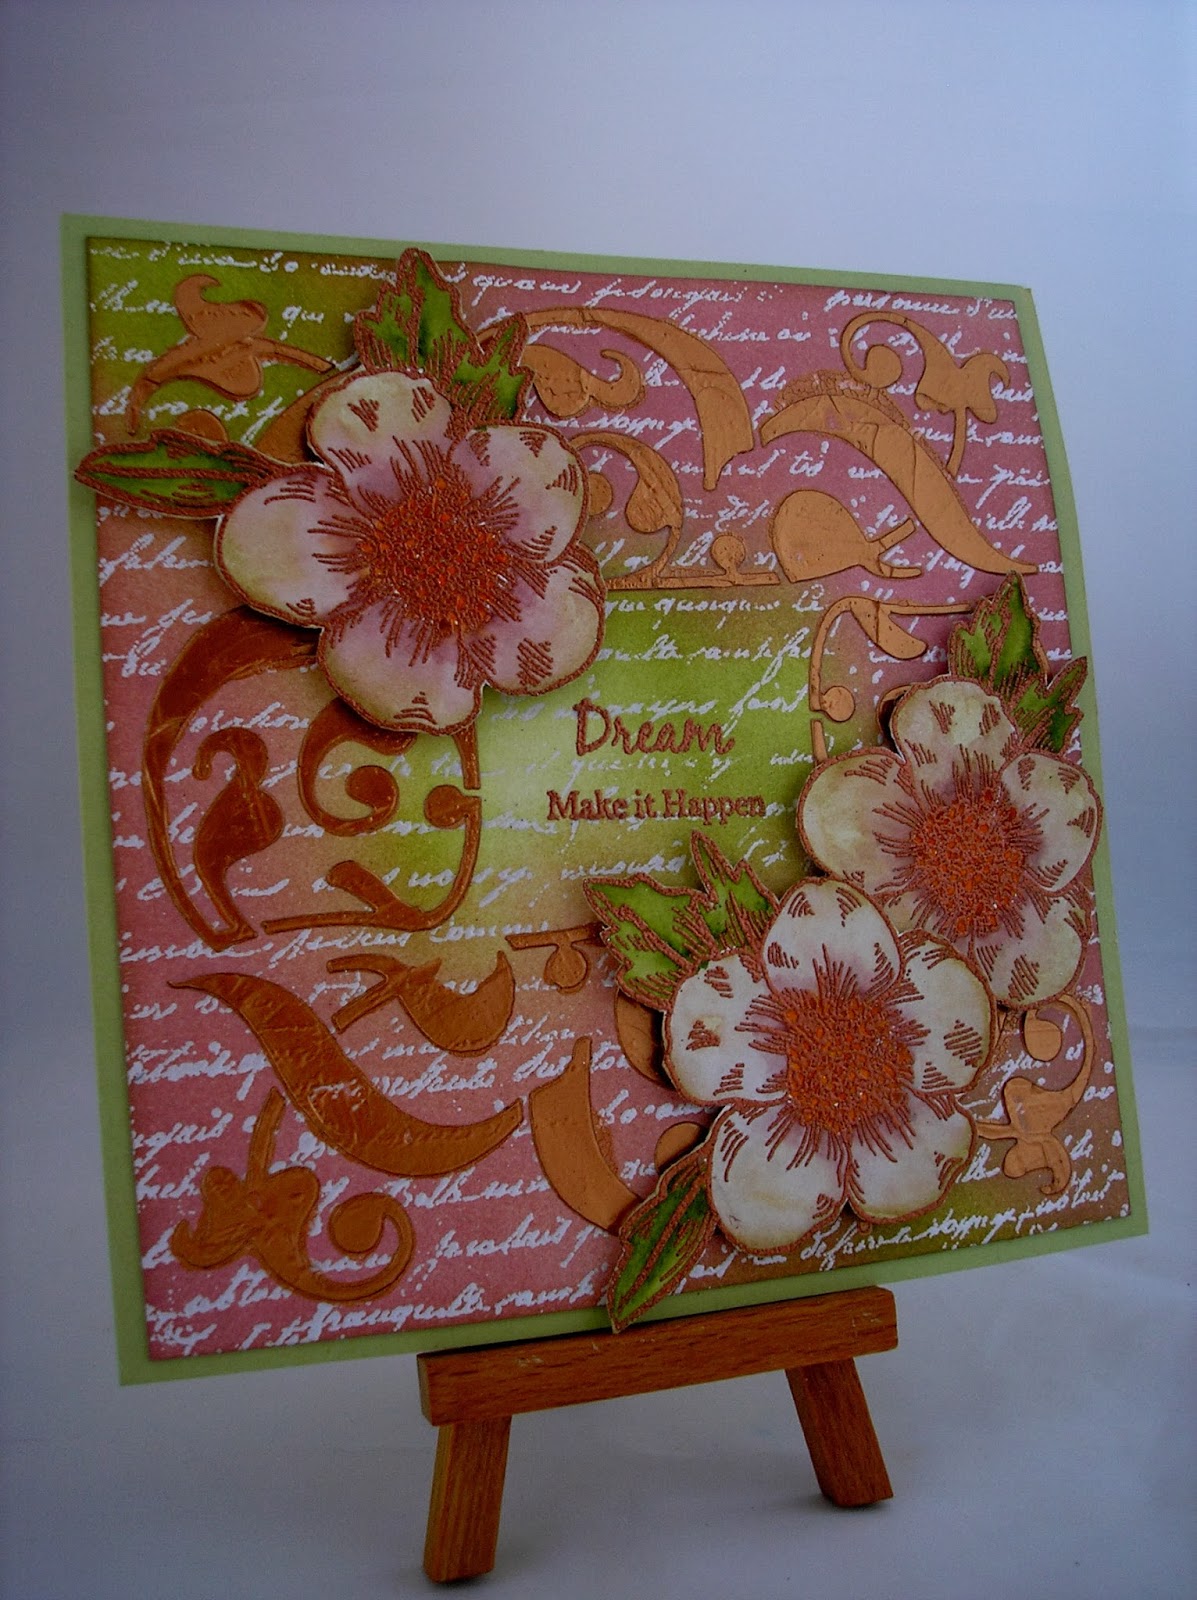
Another project using the Winter Floral stamp set for you today. I'm loving working with these stamps, especially the Christmas Rose! Everything I've used to create my card can be found at Creative Expressions.

I started with the background - stamped with a Wendy Vecchi script stamp and embossed in Arctic Pearl, then inked with Victorian Velvet and Peeled Paint DI. I then took the Flourish mask and applied Cosmic Shimmer Copper Embossing Paste through it. The flowers are stamped and embossed it copper and then coloured with Distress Markers.


Next week, Creative Expressions are having a blog hop to celebrate the launch of some exciting new products from Couture Creations - so pop over on Tuesday, join in the fun and maybe win a prize.

Thursday, 7 November 2013

Cyclamen


Today I have a second project using the Winter Flowers stamp set from Creative Expressions. I've used a masking technique to produce a circle of blooming flowers and here's how I did it.


First of all, I stamped my image onto post it notes a couple of times and cut them out.


I lightly marked a circle onto my cardstock in pencil, then stamped my image at 3, 6, 9 and 12 o'clock around the circle. I placed the masks over the first two images and then stamped between them.


I continued around the circle, stamping and moving the masks as I went around.


When complete, I rubbed out the circle and coloured the images using distress markers, blending with water. I cut out the centre of the circle to add my greeting and used 3d foam to mount my card.


Don't forget to head over tot he Creative Expressions blog to see what the rest of the design team have been creating.

Thanks for stopping by.


Thursday, 31 October 2013

Thinking of you

I'm very excited to share my first official Creative Expressions Design Team project today.
For this month, we're working with the Winter Flowers stamp sheet, so I'll be showing more projects using this set, and more inspiration can be found by visiting the rest of the DT's bloggies.

Stamp the image onto Milk cardstock using Versamark, emboss with black powder. Take a Spellbinders circle die, place over the image and mark, with a soft pencil line, where the image overlaps the circle.


Cut out the parts that extend beyond the pencil lines.


Replace the die, lining up with the pencil lines. Bring the cut out portions to the reverse of the die, so that they will remain intact after cutting. Cut out the image.


Colour the image using Distress Markers, then use Old Paper Distress ink to define the edges.

Apply Old Paper distress ink to the Meadow mask by That Special Touch. Run through the die cutting machine to transfer the ink and to emboss the card. Define the edges with Old Paper DI


Die cut a Scallop Circle and a Labels One and mat onto the card front, along with an embossed greeting on a Fancy Tags die cut. Finish with a Seam Binding bow.


Thanks for stopping by, and don't forget to check out what the rest of the team have been up to by following the link on the left.


Tuesday, 22 October 2013

Silver Ribbons

Sue Wilson has today launched the first, of what will be regular craft videos on her blog. The way Sue uses Spellbinders dies never ceases to amaze me, so I'm sure this new venture will provide lots of inspiration.
http://www.particraft.blogspot.co.uk/