Tuesday, 30 April 2013

Look who's 'helping' me craft today

I've adapted to Izzy helping me on the computer. She loves to come and walk all over the keyboard and press the buttons, - the other day she managed to reset the brightness with her front paws and it took tech support to rectify it! Well today she decided to help me craft, fortunately I'd only just sat down, so no glue, glitter and gunk were involved.


To my shame, I've let myself get behind with my cardmaking - my brother in laws birthday totally passed me by and his card ended up being almost a week late. I'm blaming the early Easter - it can't be my ineptitude after all can it? It's my mum's birthday on Friday so in plenty of time, here is her card. Quite simple, but I think it looks lovely.

TFL

Sunday, 28 April 2013

Adventures in bookbinding

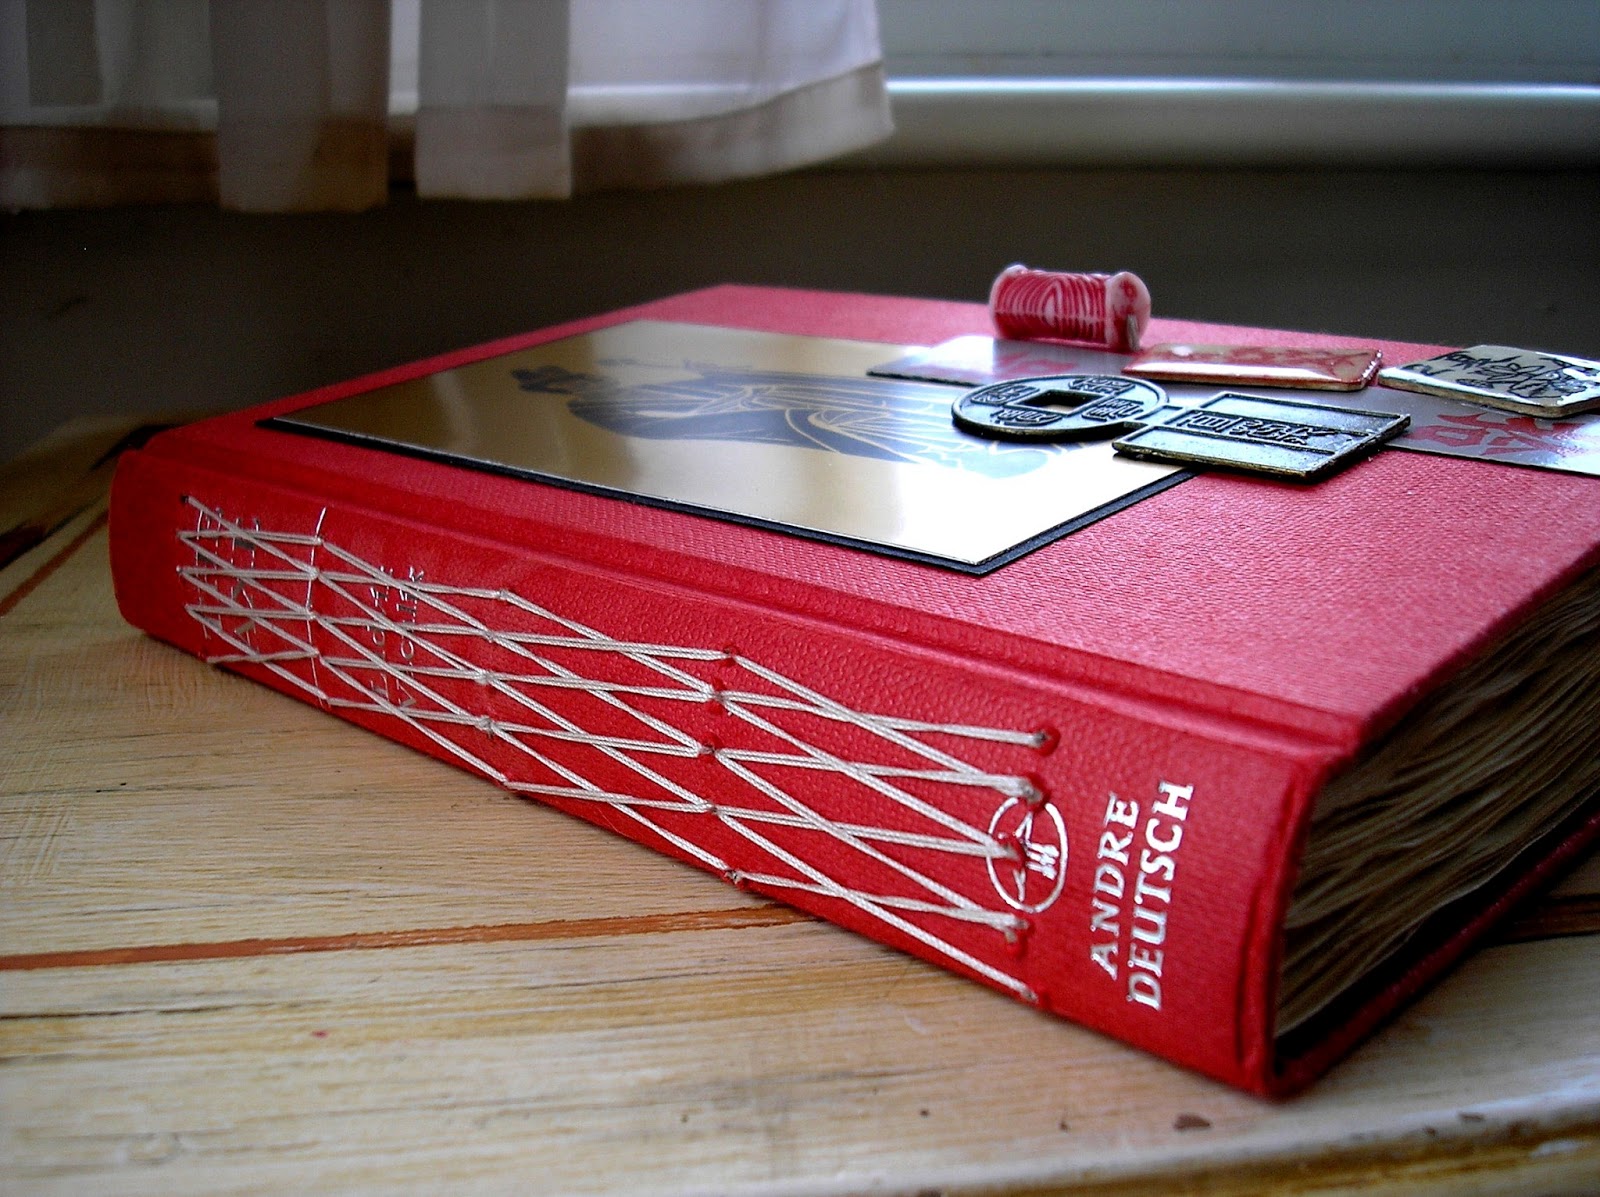
I've developed quit a youtube addiction of late - all in the interest of research of course (although the hour I spent 'learning' why Michael Jackson is actually still alive is time I'll never get back and a tangent I sincerely regret) So I've been looking into different methods of book binding and also junk journalling and have been seriously inspired by Michelle at The Paper Addiction and Marianne at Pocket full of vintage. Last weekend I tea dyed a shed load of paper and yesterday bought some hardbacks to demolish for practice. This is my first attempt - Marianne recommends having a practice first on scrap, but my thinking was I'm an experienced sewer/cross stitcher/ papercrafter, how hard can it be - the answer? pretty hard (not enough hands being a major stumbling block) For all my hubris, practice would've helped, but I'm ok-ish with the results and I've learned from my mistakes and got a useful book to boot.

I had left the cover unadorned and without the fastening, it was meant to be rough and ready, primitive, but Ray snaffled it for his research, asked for a fastening and hinted at some form of embellishment. I made a hole, added a grommet and looped a hair band through the back cover, sewed a toggle type bead on the front for the band to attach to as a fastening and then added some oriental ephemera including some more of my art tiles.


Wednesday, 24 April 2013

Found in the attic

Well not really, but I wanted it to look as though it was. I started making this on Saturday and had it almost finished by Saturday night, but I've been faffing around with it ever since - now I'm stepping away and declaring it finished, mainly because I've stuffed it to the gills with 'stuff'.
It's largely made from the Shabby n Chic kit by Ephemera's Vintage Garden, I've added a few extras but not too many. The kit includes all the envelopes, reproduction adverts. tags and such. I distressed it to within an inch using ink and a distress tool to scuff the papers. The only thing missing is the musty aroma!


Sunday, 14 April 2013

Steampunk Debutante

This weekend I've been having a play with some remnants of one of my favorite paper collections - Steampunk Debutante by Graphic 45. I'm closely guarding the last of my full sheets (not sure what for, but it needs to be done - my name's Tracy and I'm a paper addict) but I still had the bits left from this lovely specimen. It's such a shame to see this beautiful paper sitting around, so I've created a paper bag mini; small in size though it is, it's a little tubby thing and it jingles and crinkles in a really satisfying way - don't worry, the men it white coats are on standby to confiscate my sharp objects.

Enjoy!


Handmade flowers and chipboard cogs.


A shot of all the inserts from the pockets - plenty of additional space for pictures and journalling.

Monday, 8 April 2013

The Notebook (s)

No not the Ryan Gosling film unfortunately - but lets take a moment to think about him, mmmm.

A couple of weeks ago, Ray asked me if there was any way of making majong themed art tiles. His idea was to use printed images, but I had a bit of a play and came up with some stamped ones - not sure what he had in mind for them, I left them as they were. However, he'd expected me to actually DO something with them - the very idea! Well after a bit of jiggery pokery, these are what I made.


I've also been using the other tiles I made from my first batch - these are a bit more mixed media arty farty ish. I love the way the frame worked out, and the newsprint cover makes me smile - so random, so me!


All these are available to buy in my etsy shop
Tx


Sunday, 31 March 2013

Dirty Weekend

My creativity seems to be full on at the moment. Sock making has taken a back seat for the moment in favour of a crochet scarf/ wrap. I also have two magazine articles in progress - one a mini book, the other cards. The book is almost finished - just as well as my deadline is 8th April - it just needs a few tweaks and faffy things. The cards are there in my head and partly on paper but still very much in the playing stage - the brief is men's cards, but I need to use some new to the market glitters. Glitter and men's cards aren't things you'd naturally throw together, but I like a challenge - or should that be I'm challenging?

As if that wasn't enough, I'm still working on the swatch book I mentioned. The pages will be added to over time, but I have so many pages already, that I'm in dire need of some sort of binding to contain them. Enter inspiration in the form of cardboard packaging - again, inspiration and cardboard packaging not normally closely bound but there it is. So I started ripping and peeling layers of cardboard and got more than a little carried away. After peeling the top layer off to expose the corrugation, I added manuscript paper, scuffed the edges and applied picket fence distress stain and inks. For texture I pasted rock candy distress crackle through a mesh stencil, inked into the cracks, then went in with some of my homemade texture paste and various shimmer mists.

I wanted to incorporate one of the art tiles I made the other week, to that I added die cut flowers inked with mists and a gilded flourish. I was all ready to pull it all together and whilst mulling over my title, I spied some crayons I'd bought for melting - the result was a 'rough' seal stamped with 'create' which led me on to melting ultra thick on a craft sheet over an iron and then stamping. My first attempt is ok, but then I decided to try adding coloured embossing powder. I love the way this one turned out.


The finished cover. It's evolved into much more than I initially intended, but I'm so pleased that I let myself go with the flow and experiment.
Now I really need some industrial strength cleaner to remove all the craftermath from my hands!


Monday, 25 March 2013

When A Plan Comes Together

For the past week or so, I've been working on a techniques swatch book for myself and wanted to do some examples with texture paste. Not having any texture paste made my task difficult and the Range wanted me to part with £9.99 for a tub so I decided to attempt to make my own. Well, the family haven't heard the end of my 'for pennies' version, and why would they, it's fantastic!

I'd heard that you can use talc or cornflour to make texture paste but I wanted a rough grainy look, so I went with bicarb (baking soda) - I guess salt would work too and maybe seasalt would react interestingly with any ink. (mmmm something to try later I think) I mixed the bicarb with a little white acrylic paint and PVA then slapped it on through a tyre tread mask from That Special Touch. I oversprayed the dried paste with various inks and micas - in real life it looks very oil on water/muddy which was what I was going for.


UPDATE
Tried seasalt - very bad idea, but cornflour makes a really nice fine  paste.